Pages

Ads 468x60px

Showing posts with label Recipes. Show all posts

Friday, January 23, 2015

Frozen...food not the movie :)

Years ago, when I heard about the idea of making a month's worth of meals in a day, I was intrigued.  Then I thought about the practicalities...with a family of 10, that would fill up a HUGE freezer!  Also, the idea of spending an entire day planning and grocery shopping for those meals and another entire day in the kitchen preparing them sounded like torture!  The less time I spend in the kitchen, the better!

But...I came up with a compromise that worked for my large family and works even better for smaller families!  I don't prepare complete meals but I do make some things in large quantity for throwing together into a dinner later.  Things that take a relatively long time to cook, I'll make at least double and sometimes more to freeze for later.  It takes no extra time to make 8 cups of rice than it takes to make 4 cups.

Here's an example - I had a dinner in mind but my husband said he felt like Cashew Chicken.  He also said it probably would take too long IF we had all the ingredients.  I just smiled and headed into the kitchen.  I pulled out a quart freezer bag of cooked chicken breast cubes, a freezer bag of cooked brown rice, and a handful of toasted cashews from the freezer.  With the addition of a can of chicken broth, some Asian spices, chopped onion, garlic and celery, some thickener and soy sauce, my Cashew Chicken was ready to eat in 15 minutes.  Super easy, super fast and didn't taste like it had been in the freezer  :)

Some of the best things to make in quantity and freeze in portions are beef, chicken, and ham.  I'll take two fairly large beef roasts and cook them in the crock pot.  When finished cooking, I'll take one roast and divide it in half.  One half goes in a freezer bag as is...that will be for a pot roast later.  The other half gets cut in cubes for stew or soups and divided in more freezer bags.  The other roast I'll shred for BBQ beef, taco or burrito meat, and beef and gravy.  Again, it gets divided into several freezer bags.  Chicken is prepared similarly...several chicken breasts cooked or grilled then frozen for teriyaki chicken, stir fry, pot pies...you get the idea.  With the meat already cooked, the rest of the meal is easy and quick to prepare.  I also regularly freeze brown rice as it takes fairly long to cook and sometimes, I don't have that much time.  It freezes wonderfully. 

When freezing, I like using freezer bags because they are compact and stackable.  Rigid containers sometimes leave too much airspace and therefore, take up extra space.  Always label what is in the bag, how much and when it was prepared.  

Whatever you cook regularly is a possible candidate for making in bulk and freezing.  It saves on energy and time, which is a great help for a busy mom!  If unexpected visitors arrive just in time for dinner, it's so easy to pull out another bag of meat, thaw it and add to your meal.  What could be easier?  Ok, calling out for pizza...   :)


Monday, January 19, 2015

A wild and crazy birthday cake!

A wild and crazy cake!
Birthday traditions...every family has them.  And even within a family, some kids develop their own unique traditions that they HAVE to have  :)  Such is the case with one of my daughters.  From the time she was 12, she has always requested a "colorful" cake.  So, every year I try to out-do myself with coming up with a wild and colorful cake  :)

A few months ago, I saw a fantastically beautiful cake on Pinterest.  (Found on tablespoon.com)  I immediately knew what I was doing for my daughter's next birthday!  Let's just say, as usual, my "creation" didn't turn out quite like the amazing picture I pinned but it was a big success anyway!

 For a three layer cake you'll need...
2 white cake mixes + the ingredients to make the cake as directed
Buttercream frosting...from a can, a mix or from scratch
Gel or paste food coloring in a variety of colors
Candy Melts in a variety of colors
Corn syrup
Heavy whipping cream

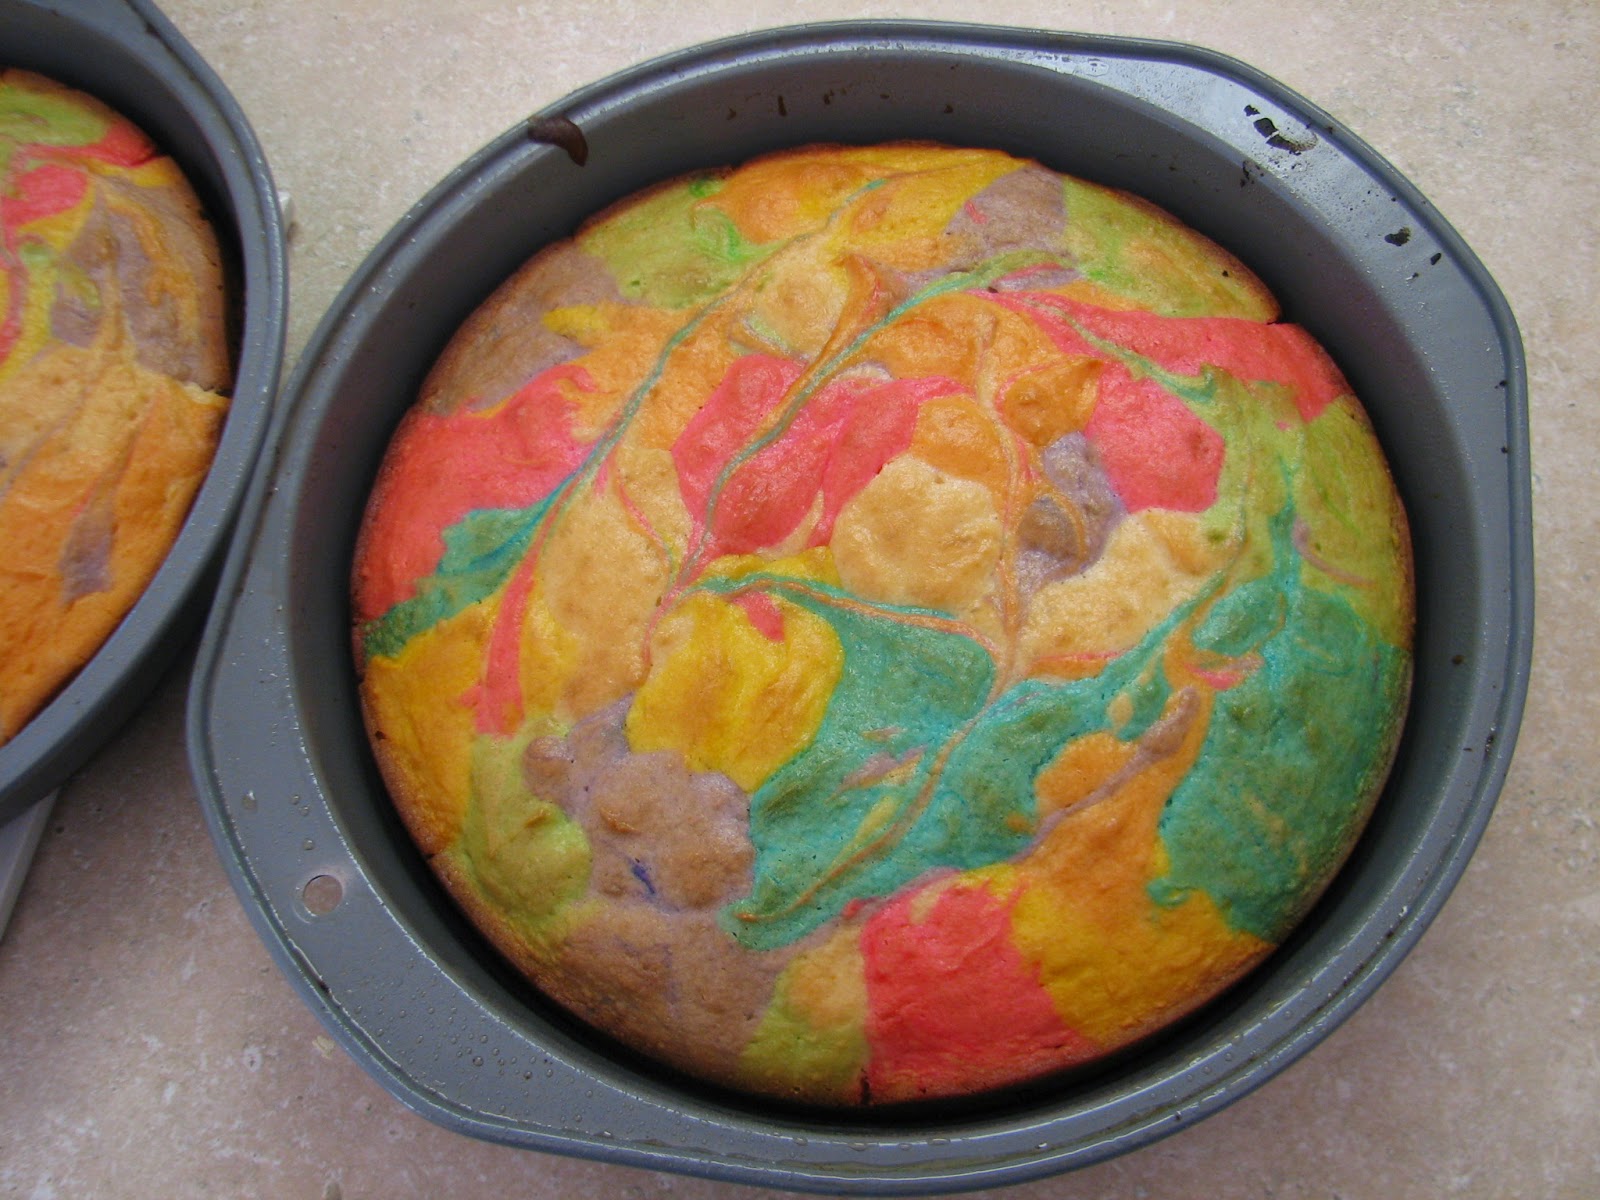
First, I used two traditional boxes of white cake mix and mixed it up as directed.  Then before pouring it into pans (Four  8" round cake pans), I divided the batter into 6 bowls.  Each bowl of batter got dyed a different color.  Then I randomly plopped blobs of colored batter into the pans.  A quick swirl with a knife through the colors and they were ready for the oven.
Colorful batter!
Plop the batter into the pans...
Swirl gently with a knife...
Fresh out of the oven.
After the cakes were cooled, I trimmed off the rounded tops.  I only needed three cakes so the fourth went into the freezer for another day.   Using a basic buttercream frosting, I stacked and frosted the cake, trying to get the top as smooth as possible.  I'm NO cake decorator so my results were less than perfect, but...oh well  :) 

A turntable would have been handy...
I put the frosted cake on top of a large can so I could turn it easily and put a piece of parchment paper underneath the can to catch drips.
I used six colors of candy melts (should have stuck with the lighter/brighter colors...purple was too dark).   Candy melts were divided into six bowls with 5 oz melts in each bowl.  Also, in each bowl went 2 T. corn syrup and 4 T. heavy cream.   Microwaved until everything was melted, stirring occasionally.  The consistency should be slightly thickened.

Purple was probably too dark but the rest were perfect!
Then the fun part...
Alternating colors, I dripped spoonfuls of melted candy melts over the cake, letting it drip over the sides and over the top.  (If the melts get too thick, add a little more corn syrup.  If too thin, let it cool slightly.)


And that's all there is to it!  A cacophony of colors for a girl who likes her cakes wild!

YUMMY!
But wait...there's more!
The melts that dripped onto the parchment make wonderful finger paints!


Have fun!

Thursday, November 27, 2014

What's cooking? Wednesday - Better than Pumpkin Pie!

This is a repost from 2012, back by popular demand  :) 
I'm so excited for Fall!  That means I can make this dessert more often!  It's easy (no making pie crust), and makes you feel like you're eating something healthy because it's pumpkin.  :)  If I had to pick a non-chocolate dessert, this would be first on my list!

Better than Pumpkin Pie 

1 pkg. yellow or white cake mix, dry
1/2 c. butter, melted
1 29 oz. can 100% pure pumpkin
1 c. sugar
4 eggs or 1 c. egg replacer
2 t. cinnamon
1 t. ginger
1 t. salt

Mix dry cake mix and melted butter together until crumbly. 
Pat 1/2 of the crumbs on bottom of a greased 9X13 pan.
Mix pumpkin, sugar, eggs, and spices with wire whisk until blended.
Pour over crumbs.
Sprinkle remaining crumbs evenly over top.
Bake in 350 degree oven for about 30 minutes or until lightly browned on top.
Let cool.  Serve with whipped topping.


Monday, October 6, 2014

Super Power Smoothie

 It's said that you can't judge a book by its cover.  Well, you can't judge a smoothie by its color either  :)

Being the good health conscious mother that I am, I bought a big bag of "power" greens from Costco last week.  The bag was full of kale, chard and spinach.  When I got home, the idea of making a salad out of the greens didn't sound too appealing though so I thought I'd try putting them in a smoothie.  I've done it with spinach with good success so, why not?  And besides, I didn't want to waste a whole bag of "good stuff".


I got out my trusty blender and put two big handfuls of power greens in the container.  Then I added one chopped apple, a handful of frozen pineapple and about a cup of cold water.   I blended it all until super smooth and tried it.  It actually tasted really good!  I can handle healthy greens this way any day!

If I have to eat dark green leafy veggies, I'd rather drink them in a smoothie than have to suffer through chewing them in a salad or cooked or whatever other creative idea someone comes up with. 

If you're brave, give it a try  :)


Tuesday, September 16, 2014

Yummies from the garden!

Now, this was a fun salad to make and eat!  I went into my garden and brought in several kinds of lettuce, three kinds of tomatoes, cucumbers apples and one lone broccoli floret.  Chopped everything up (except the broccoli), put it in a bowl, added a handful of cashew pieces and some grilled chicken and topped it with the broccoli floret  :)   Served it with a pretzel roll and ate it! 

Fresh veggies from the garden are soooo good!

Wednesday, August 13, 2014

A lazy cook

Who says I'm a lazy cook?!?
In a conversation with my husband recently, he casually mentioned that I was a lazy cook.  I immediately and indignantly responded that I was NOT a lazy cook!  While the conversation ended shortly thereafter, in my mind I continued to mull over his words.  Me?  A lazy cook?  How could he say such a thing?  I bake bread from scratch (even grind the wheat for flour).  I make pies, cookies, cakes and brownies from scratch and even make homemade noodles when making chicken noodle soup.  A lazy cook indeed! 

Then my thoughts turned to cooking in general.  I DO like using short cuts.  I like simple food.  If I find a recipe book and it's full of recipes with unfamiliar ingredients, I put it down and walk away.  My style of cooking is basic and healthy.  (Those pies and goodies I make from scratch?  I don't make them very often!)  There are so many other things I'd rather do than spend hours in the kitchen, cooking.  If that makes me a lazy cook, then I'll wear the label proudly.  :) 

Lazy cooks of the world, unite!

Tuesday, August 12, 2014

What's cooking? Orzo Summer Salad

Orzo is a cute little pasta that, when cooked, looks like long-grained rice.  It makes a great base for a summer salad.  Here, I substituted orzo for the usual penne pasta in an Italian main dish salad.  Try it yourself and see if you like it as much as my family does.

Orzo Summer Salad
1 c. uncooked orzo, cooked as directed on package.  Drain and cool.
1/4 to 1/2 c. bottled Italian dressing (I used Bernstein's Fat Free Cheese & Garlic Italian dressing)
Lots of fresh veggies, chopped in bite sized pieces.  I used two zucchinis, 3 roma tomatoes, 1/2 red pepper, 1/2 head broccoli florets, and 1/2 red onion
2 oz. pepperoni 
1 oz. olives, sliced (I used Kalamata olives)
1 to 2  oz. mozzarella cheese, diced or shredded OR feta cheese
Parmesan cheese to sprinkle on top

In large bowl, combine the cooled orzo and the veggies.  Mix with the dressing.  Add olives, cheese and pepperoni.  Cool in refrigerator, at least one hour.  Serve with parmesan cheese.  All the ingredients can be adjusted based on personal preference. 

Just one cup makes enough pasta for a large salad

Lots of veggies!  Whatever is in your garden or your family favorites

To cut down on grease, cut pepperoni into bite-sized chunks (or use pre-sliced pepperoni) and arrange on plate, covered with two layers of paper towels.  Cover with another two paper towels and microwave for 40 seconds.

Pepperoni after microwaving has better flavor and less grease!

Finished salad, minus the feta cheese and parmesan.  My husband doesn't like feta!  (I LOVE feta!)

Friday, July 25, 2014

The ultimate comfort food!

Do you want to impress your family and friends with an amazingly heavenly treat tomorrow for breakfast?  Give this recipe for homemade biscuits a try.  They are soooo good and super easy to make!

Homemade Biscuits
2 c. flour
1 T. baking powder
1/2 t. salt
1 cube butter, cold
1 c. buttermilk

Preheat oven to 450 degrees.   Wash your hands thoroughly.  This is a hands on project!

Cut butter in to chunks.  Set aside.

In medium size bowl, add the flour, baking powder and salt.  Mix well with hands.
 Add the cut-up butter and start incorporating it into the flour mixture.  Keep working it until the mixture is crumbly with no large lumps of butter.
Now it's time to add the buttermilk.  I use a fork to start mixing and then use my hands to finish.  It's messy! You don't want to overwork the dough.  (That makes it tough and the biscuits won't rise very well.)  Mix until it all starts to hold together and can be formed into a ball.
In the picture, I'm about ready to switch from fork to hands.
Place the ball of dough onto a floured covered surface.  Knead it a couple of times.  Again, not too much!  The less you handle the dough, the better!
Roll to a thickness of about 1/2 inch.  In the picture, I'm using the rolling pin my grandmother (who was born in 1898) gave me when I was a teenager.  Every time I use it, I think of her!
Cut out biscuits.  Today I'm using a sippy cup because I like the smaller size.  :)  You can use a traditional biscuit cutter or any size cup you want.
Arrange biscuits on ungreased cookie sheet and bake for 9-10 minutes, until very lightly browned on top.  I set my timer for 9 minutes and checked them.  They were perfect!
There's nothing left to do now but EAT THEM!
With jam or butter or just plain, they're a real treat! 
Hope you enjoy them!


Tuesday, April 22, 2014

What's Cooking? Dark Chocolate Cherry Cashew Squares

Today I found the most amazing, delicious recipe!  It is a copy-cat recipe for KIND bars - chewy, slightly sweet, nutty and packed with protein!  You can find the original on the blog http://www.theyummylife.com/Homemade_KIND_Bars.  The directions are super clear and the blogger (Monica) has recipes for eight different varieties.

I need to bring a "healthy" treat to an activity tonight so I thought I'd try these bars.  I had most of the ingredients and played around with substituting those I didn't have.  The results were better than I hoped for!  I cut them into squares for the activity...smaller, bite-sized pieces are better than large, substantial bars.

Here's my adapted recipe for Dark Chocolate Cherry Cashew bars/squares -

  • 2 cups whole unsalted almonds, coursely chopped (I used my VitaMix)
  • 3/4 cup unsalted cashew pieces
  • Combine nuts and spread onto cookie sheet. Bake at 350 degrees for about 10 minutes.
  • Pour into large bowl.

  • 1/2 cup dried cherries, coarsely chopped
  • 1/4 cup craisins, coarsely chopped
  • 1/2 cup Rice Krispies
  • 1 tablespoon flaxseed 
  • Add these to bowl with nuts.
  •  
  • In 2 quart sauce pan mix the following-
  • 1/3 cup honey
  • 1/3 cup light corn syrup
  • 1 Tablespoon vegetable oil
  • 1/4 teaspoon salt
  • 1 teaspoon vanilla 
  • Cook over medium high heat until a candy thermometer reaches 260 degrees.  
  • Remove from heat and  pour over nut and fruit mixture.  Stir quickly and thoroughly.
  • Scrape mixture into greased 9x13 pan and press down firmly so the mixture is tightly packed.
  • Wait about 15 minutes.  Turn upside down onto cutting board and cut into bars or squares.
  • Drizzle with chocolate (The recipe says optional but I say necessary!)
  •  
    Needs chocolate!

  • FOR CHOCOLATE DRIZZLE (optional) -
  • 1 cup semi sweet chocolate chips
  • 1 tablespoon vegetable oil
  • Combine chocolate chips and oil in Ziploc quart freezer bag.  Microwave in 20 second increments (for a total of about 1 minute), kneading and mixing chips after each 20 seconds until thoroughly melted.
  • Snip off tiny corner of bag and drizzle chocolate over bars/squares.  
  • When chocolate has set, eat! 

Melting chocolate in a baggie is so much easier than in a bowl!  Less clean-up afterwards too!
For variations as well as very helpful tips and photographs, I hope you check out Monica's wonderful  blog!


Saturday, April 12, 2014

Making meal planning easier

choosemyplate.gov
Menu planning and grocery shopping are not my favorite activities.  I often wish Purina (who makes cat chow, dog chow and other animal feed) would come up with People Chow so I didn't have to worry about planning what to cook.  :)   Not only do we have to plan and make meals, we have to be mindful of nutrition, budget and health.  Purina, where are you?!

Having studied nutrition and worked with families who needed education on planning healthy, inexpensive meals,  I found that the best resource for teaching these things is found on the USDA's website, choosemyplate.gov.  This is the latest guideline for health and wellness from the federal government, replacing the My Pyramid program.  Its name come from the visual representation of how the proportion of various types of food should look on your plate.

This website has information, recipes, and tips for planning and preparing healthy meals that are based on different families needs and lifestyles.  They focus on whole grains, fruits and veggies, lean meats and foods that are naturally inexpensive.  Included are charts and calculators for tracking your food input, weight, goals and exercise.  There is even a section for teaching children about food and nutrition which is quite entertaining and fun (well, however fun learning about nutrition is, anyway).   It is quite inclusive! 

I highly recommend this website and hope you take a look at it!  Anything to make the process easier is my type of program!


Friday, February 14, 2014

Happy Valentine's Day!

My six year old daughter made this Lego heart for me on Valentine's Day many years ago!  Still have it and love it!
Happy Valentine's Day!  So many ways to show your love for your family, today and every day.
 Here is a super quick activity for you to do with your kids.  Let them be creative and have fun! 


Needed:
1 package pretzel rods
Candy Melts, in whatever colors you want
Various sprinkles

Melt Candy Melts in microwave or in top of double boiler until completely melted.  Be sure NO water EVER touches the melted chocolate.  It will cause the chocolate to seize.

Dip pretzel rods in the melted Candy Melts, sprinkle with sprinkles (that sounds odd) and let cool on a sheet of wax paper.

With leftover candy melts, put melted chocolate in heavy duty freezer bag, cut off a tiny corner of the bag, squeeze candy down to that corner and let the kids make designs on wax paper. They harden quickly and the kids can decorate cookies, cupcakes, even a bowl of oatmeal with them!


Friday, February 7, 2014

What's for dinner? Cashew Stir Fry

Cashew Stir Fry
 I've been experimenting with meatless dinners for quite some time and recently tackled one of our favorite meals - chicken stir fry.  I substituted raw cashew pieces for the traditional chicken in this stir fry.  I also added yakisoba noodles and omitted rice as a side.  It tastes delicious! 

I think you'll like this recipe.  It is super quick to make.  Tonight's stir fry started at 6:05 pm and was set on the table at 6:20pm.  That's my kind of dinner!

Cashew Stir Fry
1 T. oil.  I like sesame oil because of its flavor but any kind will do.
1 T. beef soup base, dissolved in 1 c. warm water.  Or, you can dissolve 3 bouillon cubes in 1 c. water.
1-2 T. soy sauce.  I use Kikkoman light.
1/2 c. raw cashew pieces.  They're quite inexpensive bought in bulk.
2 c. yakisoba noodles.  You can find them at Costco, Walmart and most grocery stores.
Vegetables of choice.  In Winter I usually buy bags of frozen vegetable mixes from Winco and/or Costco.  Tonight I used 2/3 of a bag of Bird's Eye Oriental Stir Fry Vegetables (58 oz).  Amounts vary depending on how much veggies you want to use.

In large frying pan, heat oil over high heat.  Add raw cashews and stir around until they start to brown.  It browns quick!  Add Yakisoba noodles, about 1/4 c. beef soup base/water and about 1 T. soy sauce.  Stir around until noodles begin to brown in areas.  Dump in veggies and another 1/4 c. soup base/water.  Stir everything together.  Reduce heat to about medium and cover pan for a few minutes.  This helps the frozen veggies cook quicker.  If you use fresh veggies, you won't need to cover the pan.  Lift pan and stir again.  You might need to cover again for a few more minutes.  When veggies are beginning to get tender and all water has evaporated, you are done.  The amount of water you use will depend on how high your heat is and if you use fresh or frozen veggies.  If your stir fry starts to stick to the pan, add a couple tablespoons of water/soup base or more soy sauce.

The instructions might seem complicated but really it's simple and quick.  Experiment with your own combinations and flavors.  It's quite flexible.  Enjoy!

Cashews, frozen veggies, yakisoba, soup base, soy sauce and sesame oil.  That's it.

Cashews and yakisoba starting to brown.

I cover my pan with a pizza pan - no lid large enough  :)

Veggies tender, not overcooked.


Wednesday, January 1, 2014

A healthy start to the new year!

Orange Creamsicle Smoothie!
Happy New Year!  Do you have the goal of losing weight or eating healthier this year?  You're not alone!  To help you start out right, here is a new smoothie recipe for you to enjoy...

Orange Creamsicle Smoothie
2 oranges
2 bananas
2 peaches (optional) (I used frozen today)
2 carrots
1 scoop protein powder
water to blend

Blend everything together until smooth.  That's it!


I like to use at least one kind of frozen fruit in my smoothies so I don't have to use ice cubes.  I always have frozen bananas, blueberries, mangoes, and pineapple in the freezer.  I just happened to have frozen peaches left over from summer so I used those today.